Oct 30, 2012

Foodie Pen Pal Reveal - October

This month I participated in a Foodie Pen Pal through the Lean Green Bean. You are given a name of a person you buy goodies. Then you mail it. Another person gets your name and they buy you goodies and mail it to you. There is a spending limit of $15. Lindsey, the coordinator, is very organized and has specific directions.

--------------------------------------------------------------------------------------------------------------------

-On the 5th of every month, you will receive your penpal pairing via email. It will be your responsibility to contact your penpal and get their mailing address and any other information you might need like allergies or dietary restrictions.
-You will have until the 15th of the month to put your box of goodies in the mail. On the last day of the month, you will post about the goodies you received from your penpal!
-The boxes are to be filled with fun foodie things, local food items or even homemade treats! The spending limit is $15. The box must also include something written. This can be anything from a note explaining what’s in the box, to a fun recipe…use your imagination!
-You are responsible for figuring out the best way to ship your items depending on their size and how fragile they are. (Don’t forget about flat rate boxes!)
-Foodie Penpals is open to blog readers as well as bloggers. If you’re a reader and you get paired with a blogger, you are to write a short guest post for your penpal to post on their blog about what you received. If two readers are paired together, neither needs to worry about writing a post for that month.
-Foodie Penplas is open to US & Canadian residents.  Please note, Canadian Residents will be paired with other Canadians only. We've determined things might get too slow and backed up if we're trying to send foods through customs across the border from US to Canada and vice versa.

FPP post September Foodie Penpals Reveal Day

--------------------------------------------------------------------------------------------------------------------

I was paired up with Robin and Shania. For information on what I sent Robin, visit her blog at Red Robin's Nest. Shania from Eden Flour Patch sent me my foodie care package.

Here's a picture of all the goodies in the box.

These cookies look delicious for either a work treat or in my camera bag.


When Shania asked me my likes and dislikes, I mentioned coffee - medium or light roast. This coffee is the best of both worlds. - delicious coffee and Entenmann's pastry. I get the flavor of the pastry without all of the extra calories. When I make coffee at home, I will either drink it black or with Natural Bliss vanilla creamer. This will be good with that creamer.

There were 3 different kinds of Entenmann's coffee - Hazelnut, Chocolate doughnut, and cinnamon pastry.  Yum!

At work, I have a whole basket of magnets so I can hang things up on the whiteboard. In years past, it's been a filing system for me. When students need to finish an assignment for their regular class, I will hang it up on the board. It's so we don't lose it and so it's a visual reminder for me. Some of these magnets will go in the magnet basket. Some will go on my fridge.

More coffee. After my dinner the night I got the box, I made myself a cup of the coffee. It was super delicious !

Another box of cookies. This time with chocolate. Yum!


She also sent me some tea bags.  Those will be great on cool fall days.


Thanks for the great package, Shania.

Oct 28, 2012

Facebook

If you are reading my blog and are on Facebook, can you please come on over and like it.  Pretty please.  I've only 38 likes and one of them is my own.

https://www.facebook.com/#!/pages/Im-Hungry/148102251895946

Thanks so much!

Oct 27, 2012

Homemade Ranch Dressing

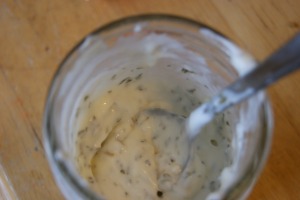
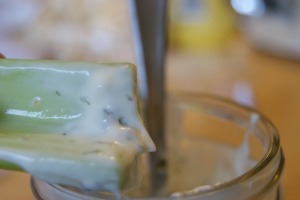
Ranch dressing is always delicious with salad or for dipping raw veggies.  I had written this recipe down a few years ago and decided to make some to dip my celery in.

This would be a great Christmas gift. 


Homemade Ranch Dressing


Stars of the Recipe:


Mix:


  • 2 Tbsp. dried parsley

  • 1 tsp. dried dill

  • 1 tsp. garlic powder

  • 1/2 tsp. dried basil

  • 1/2 tsp. pepper


Dressing:

  • 1/3 c. mayo

  • 1/4 c. milk


Directions:

  1. Mix up all the mix ingredients.

  2. For the dressing:  mix the mayo and milk with 1 Tbsp. of the mix ingredients.

  3. Keeps in the fridge for 3 days.


Oct 17, 2012

Italian Chicken

One of my favorite blogs is Eat at Home. I've been following Tiffany's blog for the past 2 years. Each week she provides free weekly menus featuring recipes she has posted. The majority of her recipes are fuss free or little fuss recipes. The recipes are also delicious.

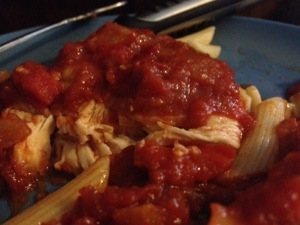
I got this recipe from the blog. She named it Skillet Chicken with Peppers and Tomatoes. I renamed it Italian chicken because my boys would have told me they didn't like it because it had peppers and tomatoes. When they did their daily ritual of asking me what was for supper, I told them Italian chicken.

I was lucky to find thin chicken breasts on sale when I did my weekly shopping. They were in a family pack for $10 and some change. I was going to be able to use the pack for 3 meals. That is a deal! Even though I told the Imaginative One that I spent a lot on the chicken and he needed to eat all of his serving. LOL!

The chicken needs to marinate overnight so plan ahead.

Italian Chicken


Based on a recipe from Eat at Home


Stars of the recipe:

Chicken marinade:

  • Chicken tenders or chicken breasts thinly pounded (pounded between two pieces of wax paper - take all of frustrations out on the chicken)

  • 1/2 bottle of Italian dressing

  • 1/4 c. of soy sauce


Italian Chicken:

  • 1 Tbsp. extra virgin olive oil

  • 3 to 4 pieces of marinated chicken

  • 1-2 Tbsp. minced garlic

  • 1/2 package of frozen onion and pepper mix

  • 1 15 oz. can of crushed tomateos

  • 1/2 box of penne pasta


Steps:

  1. Cook the penne pasta, drain, and set aside. (This can be done while the chicken is cooking.)

  2. Put the olive oil in the skillet. Heat it on med. heat.

  3. Place the chicken in the skillet. Cook on both sides until browned. (Discard the left over marinade.)

  4. Add the garlic and onion and pepper mix to the skillet. Cook for a few minutes.

  5. Add the can of crushed tomatoes.

  6. Simmer over med. low heat for 10 minutes.

  7. Serve with the penne pasta.

  8. Enjoy!


20121016-214037.jpg

Oct 15, 2012

Cherry Cheese Danishes

I love Tim Horton's. Five years ago, I stopped there almost every day on the way to work. I considered it my half point because it was almost directly in the middle of my drive to work. I would get an iced coffee and almost always get a BELT bagel sandwich.

If you are wondering what a BELT bagel sandwich was, the letters stand for bacon, egg, lettuce, and tomato. The sandwich was suppose to have to have cheese on it but I usually opted not to have the cheese on it.

Now I don't stop there as often. When I do, it's now on my way home from work instead of on the way to work. I usually get the iced coffee or hot coffee and either a cherry cheese danish or a plain bagel toasted with butter.

So when I saw a recipe for danishes on Finding Joy in My Kitchen, I knew I needed to try to make it. However I didn't want the apples on it. So I changed up the recipe to be Cherry Cheese Danishes.

My husband, another relative, and one of my students all gave the seal of approval. (My student saw me eating one for breakfast and asked if he could try some. I normally don't share my food but because he's worked really hard for me I let him have a taste. That's all he got - a teaser taste.)

Cherry Cheese Danishes


based on a recipe from Finding Joy in my Kitchen


Stars of the recipe:

Dough:

  • 1 cup flour (I used white whole wheat.)

  • 1/2 tsp. baking powder

  • 1/4 tsp. salt

  • 1/4 C. butter

  • 1.5 oz. cream cheese

  • 1/4 c. milk + 1 tsp. milk

  • 1/2 tsp. vanilla


Filling:

  • 1 Tbsp. sugar

  • 1/2 tsp. cinnamon

  • 2 oz. cream chees

  • 1.5 Tbsp. powdered sugar

  • Cherry pie filling


Steps:

  1. Preheat oven to 425 degrees.

  2. In a bowl, combine the flour, baking powder, and salt.

  3. Cut in the butter using forks or a pastry cutter. (Cut the butter into smaller pieces before cutting it into the flour mixture.)

  4. Cut in the cream cheese following the same method.

  5. Pour in the milk and vanilla. Stir until the dough become clumpy.

  6. Divide the dough into 6 parts and shape them into a small circle.

  7. Shape the circles so the edges are slightly raised. Place on a greased cookie sheet or line it with parchment paper that has been greased.

  8. Combine the cinnamon and sugar in a small bowl. Sprinkle on the crust.

  9. Combine the powdered sugar and cream cheese for the filling. Put about 1 Tbsp. of the mixture on the crust. (You may need to spread it out a little bit.)

  10. Sppon about 3 cherries and the cherry "sauce" on each crust.

  11. Bake at 425 minutes for 15 minutes.

  12. Reduce the heat to 350 and bake for 3 to 4 minutes.

  13. Enjoy!


20121015-202003.jpg

Menu Planning - Week of October 15

I've been slacking at menu planning for the past few weeks.  This is bad because I've been scrambling around trying to figure out what we were going to have for dinner. 

This week is a weird week.  I have a favorite zoo that I swear the people are going to know by name soon because I've gone there at least once a month since April.  Well, they offer teacher workshops.  The workshops combine some of my favorite things - seeing the animals and photography.  They are offering a workshop this week.  My school gave me permission to attend the workshop. 

The workshop is on Friday and Saturday.  Since the zoo is about an hour and 15 minutes away, I'm so fortunate because I have a family friend who is allowing me to spend the night at their house.  The wife is a pastor and is receiving an award that night.  Today I got an invitation to go to the dinner and award ceremony.  That is totally cool because I've been friends with the family for over 20 years.

My husband is going to have to feed the boys on Friday night before he goes to work.  Then on Saturday he's going to bring the boys to the zoo for Boo at the Zoo.  So we'll eat dinner there or on the way home. 

Onto the menu:

Monday - Chili and cornbread (We were going to have cucumbers with the soup but our fridge decided to be extra cold so the cucumber froze. :( )

Tuesday - chicken with onions and peppers, left over mashed potatoes, veggies, Hawaiian bread

Wednesday - Italian sausage and spinach stuffed shells, spiced country applesauce

Thursday - mac and cheese, veggies

Friday - crockpot sweet and sour chicken with rice

Saturday - eat out

Oct 14, 2012

Peanut Butter Blossoms Redone

Okay, peanut butter blossoms will never be totally healthy. First of all they are a cookie and second of all, you put a piece of delicious chocolate on top. However, I made a little bit healthier version of them.

The Imaginative One has a list of his favorite cookies. The top three are Snickerdoodles, Chocolate Chip, and Peanut Butter Blossoms. Today I asked the boys if they wanted me to make cookies and if so which kind. They decided I needed to make Peanut Butter Blossoms. Okay, I had Hershey Kisses but they weren't chocolate. They were pumkin spice flavored. So the Imaginative One and I made a trip over to the local Walgreens to pick up a bag of Hershey Kisses.

We went to look for shortening while there and couldn't find any. When I got home I went looking for substitutions for shortening - butter, cooking spray, lard, and cooking oil are some substitutions you can use. Butter could have worked. Cooking spray and oil were out of the question. I don't even have any or have ever had lard in my kitchen so that wouldn't have worked at all. The last choice was applesauce. I've used it before so I went with applesauce.

instead of using all purpose flour, I used white whole wheat flour.

Peanut Butter Blossoms

Stars of the recipe:

  • Hershey Kisses unwrapped

  • 1/4 cup unsweetened applesauce

  • 3/4 cup Creamy Peanut Butter

  • 1/3 cup granulated sugar

  • 1/3 cup packed light brown sugar

  • 1 egg

  • 2 tablespoons milk

  • 1 teaspoon vanilla extract

  • 1-1/2 cups all-purpose flour or white whole wheat

  • 1 teaspoon baking soda

  • 1/2 teaspoon salt

  • Granulated sugar


20121014-153818.jpg
Steps:

  1. Heat oven to 375°F. Remove wrappers from chocolates.

  2. Beat applesauce and peanut butter in large bowl until well blended.

  3. Add 1/3 cup granulated sugar and brown sugar; beat until fluffy.

  4. Add egg, milk and vanilla; beat well.

  5. Stir together flour, baking soda and salt; gradually beat into peanut butter mixture.

  6. Shape dough into 1-inch balls. Roll in granulated sugar; place on ungreased cookie sheet.

  7. Bake 8 to 10 minutes or until lightly browned.

  8. Immediately press a chocolate into center of each cookie; cookie will crack around edges.

  9. Remove from cookie sheet to wire rack.

  10. Cool completely.


Featured on Everyday Mom's Meals - Church Suppers

7 up biscuits updated

Yesterday I made sure I had all the ingredients for 7 up biscuits so we could have them with out dinner. At least I thought I did. Then I looked at the recipe and saw I needed sour cream. Oops! We didn't have any in the house or if we did it would not be edible and should be given to the trash monster.

What to do? raced through my head. I had some Greek yogurt in the fridge so I decided to use that instead. People have been subsituting Greek yogurt for sour cream so I thought this would be the time to try it out. The Greek yogurt worked perfectly. The biscuits were as delicious as before. And people didn't know my little secret.

Here is the recipe updated with Greek yogurt.

7 up biscuits


Stars of the recipe:

  • 2 cups Bisquick or baking mix

  • 1/2 c. sour cream or Greek yogurt

  • 1/2 c. 7 up

  • 1/2 stick butter


Steps:

  1. Preheat oven to 450 degrees. (Or do what I do, preheat the oven to 350 and then raise the temperature. It takes 10 minutes for my oven to get to 450 and 6 minutes for it to get to 350.)

  2. Cut sour cream into biscuit mix, add 7-up. The dough is very soft and will get all on your hands. (The Wee One said It's a very messy job.)

  3. Meanwhile put a 9 inch square pan into the oven to melt the butter.

  4. Sprinkle biscuit mix on a board or table. (I use a cutting board.)

  5. Pat the dough out and then cut the dough using a biscuit cutter or glass. (I used a small juice glass.)

  6. Pull the pan out of the oven and put the cut biscuits in the pan.

  7. Bake for 12 to 15 minutes or until golden brown.

  8. Enjoy!


Oct 9, 2012

Pumpkin Granola

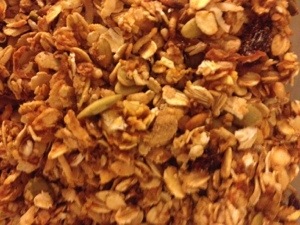
I love granola especially when I make it myself. Recently I discovered how it is easy it is to make. I've made Apple Crisp Granola and now Pumpkin Granola. It's wonderful with Greek yogurt.

Pumpkin Granola


adapted from Finding Joy in my Kitchen


Stars of the recipe:

  • 4 1/2 c. oats

  • 2 1/2 c. Rice Krispy Cereal

  • 1 1/2 tsp. cinnamon (I put more than that in mine.)

  • 1/4 tsp. nutmeg

  • 1/2 tsp. salt

  • 3/4 c. brown sugar

  • 1/2 c. pumpkin puree

  • 1/4 c. applesauce

  • 1/4 c. maple syrup

  • 1 tsp. vanilla

  • 1/2 c. pumpkin seeds

  • 1/4 c. shredded unsweetened coconut (sounds weird but is delicious in it)

  • 1/2 c. Craisins


Steps:

  1. Mix the oats, rice krispies, coconut, and pumpkin seeds together in a large bowl.

  2. Stir in spices and salt.

  3. In a different bowl, combine the applesauce, sugar, maple syrup, and vanilla. Add the pumpkin puree.

  4. Combine the dry and moist ingredients and stir to coat.

  5. Spread on a cookie sheet sprayed with cooking spray.

  6. Bake at 350 for 30 minutes. Stir after 15 minutes.

  7. Allow to cool and then add Craisins.

  8. Store in a sealed container.

  9. Enjoy with yogurt, milk, or by itself!


20121009-201927.jpg

This post has been linked to Eat at Home - Ingredient Spotlight.

Oct 6, 2012

Brownie Biscoff Puppy Chow

This is an easy alternate to traditional puppy chow. It calls for Biscoff which is the same as Trader Joe's Cookie Butter. Biscoff and Cookie Butter tastes like cinnamon graham crackers. And is delicious with honey wheat pretzel sticks.

So this snack mix tastes sort of like S'Mores especially if you add in marshmallows. Yum!

(I can buy Biscoff at my local Meijers.)

Brownie Biscoff Puppy Chow


Eat at Home


Stars of the recipe:

  • 4 1/2 c. Chex (or store brand) cereal

  • 1/4 c. Biscoff or Cookie Butter

  • 1/2 c. chocolate chips

  • 3/4 c. Brownie mix

  • Add ins: - I used mini marshmallows and mini M&M's. You can use whatever you want!


Steps:

  1. Put cereal in a large bowl and put to the side.

  2. In a small microwave-safe bowl, melt the chocolate chips and Biscoff. Start with 30 seconds, stir, then heat in 15 second increments until melted.

  3. Pour melted chocolate mixture over the cereal. Stir gently to coat all the pieces of cereal.

  4. Add 3/4 c. brownie mix to a large ziploc bag, dump the chocolate covered cereal into the bag, and shake to coat all the pieces of cereal.

  5. Spread onto a large baking sheet until dry.

  6. Once it is dry, add in the mix-ins.

  7. Put in a container to store.

  8. Enjoy!!!


20121006-121146.jpg

Oct 3, 2012

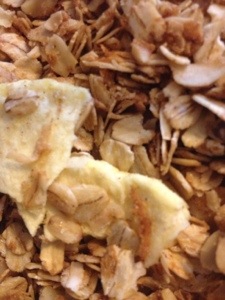
Apple Crisp Granola

I pretend to be a cereal eater. I buy cereals and most of them go to waste before they are eaten. Since the texture of milk in my cereal really bothers me, I eat dry cereal. That can get real boring quick. My husband and sons love cereal with milk. So I'm the odd man out in my family.

However, I enjoy eating granola in Greek yogurt. The pieces of the granola don't get soggy like they do in milk. So making homemade granola can be cost efficient. Homemade granola can also be adapted to my taste and preference. I also know what exactly in it so there is no mystery ingredients. Plus it's delicious!

So when this recipe crossed my inbox, my curiosity peaked. So I got the few ingredients I needed to make the granola. I made it on a Sunday morning before church. I took some with me to eat during the refreshment time so I wouldn't eat any of the not so good goodies. When I shared some of it with my fellow church goers, they were impressed with the taste. As was I.

The granola combines the flavors of fall. Cinnamon and nutmeg tickle your taste buds. Apples scream fall! There are also a few surprises hidden in the granola.

Apple Crisp Granola


Rachel Cooks


Stars of the Recipe:


  • 3 c. oats (old fashioned or quick cooking)

  • 1 c. chopped raw walnuts

  • 1/2 c. shredded unsweetened coconut

  • 1/4 tsp. salt

  • 1 Tbsp. ground cinnamon

  • 1 tsp. freshly grated nutmeg

  • 4 Tbsp. packed brown sugar

  • 4 Tbsp. canola oil

  • 4 Tbsp. hone

  • 1 tsp. pure vanilla extract

  • 2 c. chopped dried apples


Steps:

  1. Preheat oven to 300 degrees Farenheit.

  2. Spray a large baking sheet with nonstick cooking spray or line with parchment.

  3. In a large bowl, stir together the oats, walnuts, coconut, salt, brown sugar, cinnamon, and nutmeg.

  4. In a seperate microwavable bowl, stir together the canola oil, vanilla, and honey. Heat in microwave for 45 seconds on 50% power.

  5. Pour wet ingredients over dry ingredients. Stir until everything is well coated.

  6. Spread granola in an even layer over the baking sheet.

  7. Bake for 15 minutes, stir, and then bake for 15 to 20 more minutes, until golden brown.

  8. Let cool completely. Stir in dried apples once granola has cooled.

  9. Store in airtight container.

  10. Enjoy!!!!


This post has been linked to Eat at home - Ingredient Spotlight.